Tips for How to Caulk
While a common maintenance task, caulking takes some skill and an understanding of which type to use. Read on to learn how to use a caulk gun, how to remove caulk and the best tools to assist application and removal.
On the surface, caulking seems the simplest of homeowner projects, but anyone who has ever sealed around a bathtub knows it’s easy for this type of job to turn into a real mess. It takes practice to lay down a perfect bead of caulk. That’s why tradespeople who do it daily, like tile setters and painters, are so good at it.
Caulking also requires the knowledge to select the right caulk for the job. There are dozens of dissimilar materials such as tile, wood, and vinyl that require bonding and/or gap-filling around your home, and no one single product works everywhere. But help is on the way. We’ll show you how to buy the right caulk and how to lay down that elusive perfect bead.
How to Choose Caulk
Even though there are now more different types of caulk and sealant available than ever before, it’s actually easier to find the right product. In a welcome change, many manufacturers use large, job-specific labels on cartridges and tubes. You don’t have to read the fine print to learn about recommended uses. But it’s still important to understand which basic type of caulk is being offered.
For one thing, chemistry has an impact on the broad price range you’ll see in the caulk aisle: A 10-oz. cartridge costs from $1 to $7.50 or more. Chemical content also determines some important general characteristics, such as how easily caulk joints can be shaped, or tooled, whether a caulk can be painted and how durable it is.
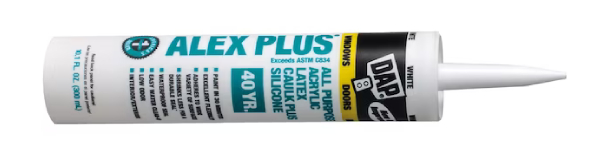
New caulks are always hitting the market, so knowing something about their chemistry can signal how big an advancement a new product really is. For example, the downside of silicone caulk is that you can’t paint it. But DAP’s All Purpose Acrylic Latex Caulk Plus Silicone is a true water-based silicone caulk that can be painted. It’s also easy to work and odorless. And instead of using mineral spirits to clean it up, you can use soap and water. Here’s a look at the four types of caulk.
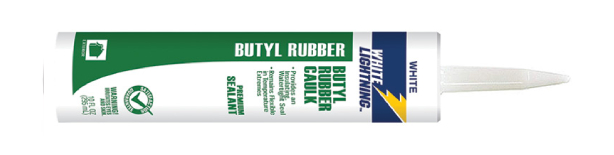
#1 Rubber Caulks
What the label say: Butyl or rubber caulk; asphalt filler; roof or gutter sealant.
Price: $2 to $3.50
Main uses: Sealing and repairing aluminum gutters; caulking aluminum flashing; filling cracks in asphalt; sealing siding around doors and windows.
Cleanup: Mineral spirits or lacquer thinner.
These products are made with rubber compounds like butyl, isoprene, butadiene, nitrile and styrene. Rubber caulks typically offer good adhesion and excellent water resistance; you can even apply them to damp surfaces. But their solvents are highly flammable and dangerous to breathe, so don’t use these caulks indoors. Rubber caulks are especially sticky and difficult to tool, and they will shrink as they cure. Without any tooling, a round bead will dry fairly flat.
#2 Latex Caulks
What the label say: Latex; acrylic; vinyl; siliconized acrylic caulk.
Price: $1 to $5
Main uses: Utility caulking for nearly all interior and some exterior sealing.
Cleanup: Water.
Also labeled as acrylic or vinyl caulks and sealants, these water-based products are the easiest to use, will handle the broadest range of applications and are often the least expensive. However, many latex caulks aren’t as durable as more expensive options. “Siliconized” latex caulks contain small amounts of silicone for improved durability and adhesion.
Latex caulks don’t contain volatile solvents that pose fire and health hazards, and joints are easy to tool. But avoid removing too much material when tooling, because shrinkage will further reduce the width of the caulk joint. A broad range of colors is available, including hues that match most plumbing fixtures. Water-based caulks can be also be painted.
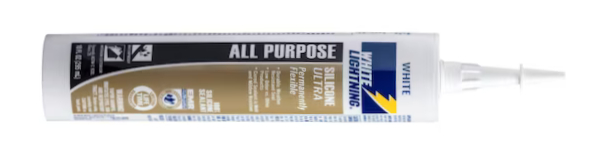
#3 Silicone Caulks
What the label say: Silicone; Silicone IITM; 100 percent silicone sealant and caulk.
Price: $4 to $7
Main uses: Sealing around tubs, shower stalls and sinks; caulking exterior trim; repairing gutters; sealing or caulking against aluminum, glass and other nonporous materials.
Cleanup: Mineral spirits.
These products stay flexible at all temperatures, are completely waterproof and adhere to a wide range of materials. They are excellent all-weather caulks that can also be used in wet indoor locations, primarily around tubs and shower stalls. However, because silicone is expensive and offers poor tear and abrasion resistance, it’s not a good choice in high-traffic areas.
Except in water-based versions, this family of caulks is unpaintable and difficult to tool. Among solvent-based silicones, caulks or sealants labeled “neutral cure” or “odorless” are preferable because they don’t give off any unpleasant odor as they cure. Plus, the acetic acid produced as “smelly” silicones cure can corrode certain metals and masonry surfaces.
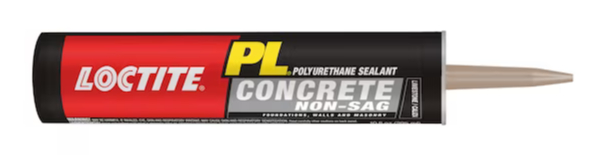
#4 Polyurethane Sealants
What the label say: Marine adhesive; polyurethane window and siding caulk; polyurethane concrete/masonry sealant.
Price: $3.50 to $7.50
Main uses: Sealing control joints in concrete; repairing cracked masonry; exterior caulking around windows and doors; repairing cracked vinyl siding; bridging gaps between porous and nonporous materials.
Cleanup: Mineral spirits.
Just like polyurethane varnishes, this family of caulks and sealants is super durable. Abrasion and tear resistance are superior to silicone, and the caulk is highly adhesive, waterproof and flexible. Shrinkage is minimal, and most polyurethane formulations can be painted or stained. Because it’s expensive, this caulk should be used sparingly — only where strength, durability and weather resistance are important. Tooling is messy and difficult, and you need to clean up with solvent.
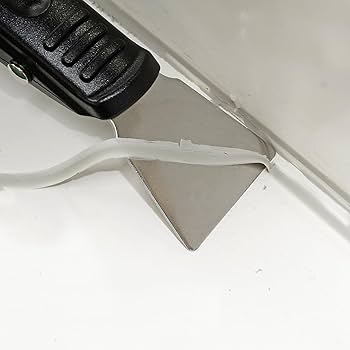
How to Remove Caulk
Existing caulk (especially silicone and poly) must be completely removed before new caulk can go on. Use a sharp utility knife or narrow chisel and brush or vacuum out all loose debris.
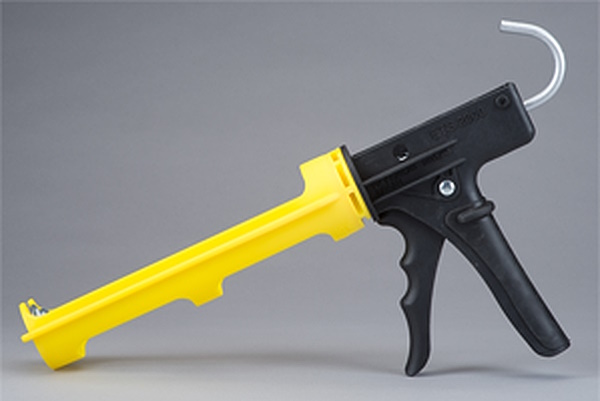
Caulking Guns
There is a difference in caulking guns. Look for a built-in cutter for the tip of the tube and an integral steel pin for puncturing the seal. Most pros prefer a solid-shaft gun that advances with a cam over the notched-shaft type, citing more even pressure on the piston, which results in a smoother bead. These guns cost $5 to $7 each. For several years we have been using the Dripless product line with great success.
But not all jobs call for a gun; there are two other types of dispensers that can make a job easier. For example, 5-oz. squeeze tubes are great for small, interior jobs. And 7-oz. pressurized cans let you lay down a uniform bead when working with only one hand, such as when caulking overhead.
How to Use a Caulk Gun
Before you open the tube, make sure the temperature and conditions are right for the application. When the weather turns cold, store your caulk indoors. The working temperature range of caulk varies by type; check the label of the product you are working with.
Another important factor in application is how you cut the tip of the tube. The biggest mistake is cutting too far down, creating an opening that’s too big. The opening should be slightly smaller than the bead you’ll apply. Also, cut the tube at an angle (up to 45 degrees).
If the crack you’re filling is deeper than 1/2 in., you must wedge flexible backer rod (available where caulk is sold) into the joint so the caulk is limited to a depth of 3/8 in. The ideal width for a bead is also less than 3/8 in. It’s easy to ignore this step, but the price you’ll pay later is an open caulk joint.
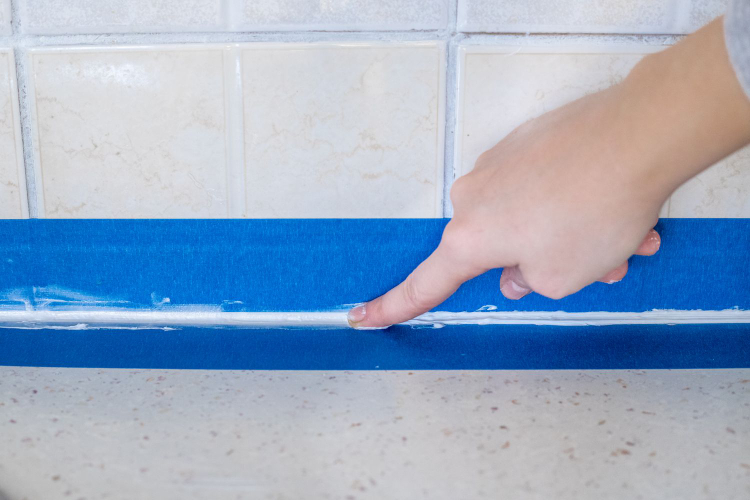
If you’re not confident of your caulking skills, consider applying masking tape to both sides of the joint before caulking. Then remove the tape as soon as you’ve finished tooling. When caulking, keep the gun (or squeeze tube) moving so you leave an even bead. You can either push or pull the tube, whichever is most comfortable for you.
As you near the end of the joint, press the release lever on your gun (or withdraw the piston slightly) to stop the flow of caulk. When applying a long bead, break it up into shorter sections.
Caulking Tools
Be extra cautious about over-applying silicone and polyurethane caulks because these sealants are difficult to tool and messy. Tool butyl, silicone, and polyurethane caulks with a caulking tool or a plastic spoon. (Water-based caulks can be tooled with a moistened finger.) Standard-cure silicone is tricky because it’s very sticky and must be cleaned up quickly — once cured, silicone yields only to a razor blade.
For smooth results with butyl and polyurethane, make sure to dip your spoon or tool in solvent. Also have the proper cleanup gear handy: a moistened sponge if you’re using water-based caulk, or solvent and clean rags with other sealants.
The replaceable tip that comes with some caulks can be used to seal a partially used tube. But caulk will still harden in the tip. If you’re lucky, your first few trigger squeezes will push the hard material free, but often it requires the help of a 16d nail or the purchase of a new tube.